Tavily 又挂了,即使挂上梯子也不行了。亟需一个开源的搜索引擎来替代,searXNG 是一个不错的选择。
searXNG 和 Dify 仍然比较年轻,项目设计、易用性上都有些问题,这个大家自行体会。
如果你自己按照官网或者一些视频安装,大概率会在 Dify 调用 searXNG 的时候报错:
Input should be a valid dictionary请严格按照本文安装配置。
在 Dify 中使用 searXNG
Dify 的安装略过。
1. 安装 searXNG
git@github.com:searxng/searxng-docker.git
cd searxng-docker
2. 修改 searXNG 配置
修改当前目录中的隐藏文件 .env,将
SEARXNG_HOSTNAME修改为你希望监听的地址(如果你想要在局域网内访问,而不仅仅是 localhost 访问)SEARXNG_HOSTNAME=192.168.0.104:28080 # 这个端口必须和下面 docker-compose.yaml 中的端口一致修改当前目录中的
docker-compose.yaml文件,删除 caddy 相关的内容(caddy 可以理解为 nginx,但是要配证书,此处我们不需要)。下面的文件可以直接复制,覆盖原来的所有内容。services:
redis:
container_name: redis
image: docker.io/valkey/valkey:8-alpine
command: valkey-server --save 30 1 --loglevel warning
restart: unless-stopped
networks:
- searxng
volumes:
- valkey-data2:/data
cap_drop:
- ALL
cap_add:
- SETGID
- SETUID
- DAC_OVERRIDE
logging:
driver: "json-file"
options:
max-size: "1m"
max-file: "1"
searxng:
container_name: searxng
image: docker.io/searxng/searxng:latest
restart: unless-stopped
user: "1000:1000"
networks:
- searxng
ports:
- "28080:8080" # 此处左侧端口和 SEARXNG_HOSTNAME 配置的一致
volumes:
- ./searxng:/etc/searxng:rw
environment:
- SEARXNG_BASE_URL=http://${SEARXNG_HOSTNAME:-localhost}/
- UWSGI_WORKERS=${SEARXNG_UWSGI_WORKERS:-4}
- UWSGI_THREADS=${SEARXNG_UWSGI_THREADS:-4}
cap_drop:
- ALL
cap_add:
- CHOWN
- SETGID
- SETUID
logging:
driver: "json-file"
options:
max-size: "1m"
max-file: "1"
networks:
searxng:
volumes:
valkey-data2:最关键的一步,修改
./searxng/settings.yml文件,删除所有内容,并粘贴入以下内容。否则 dify 调用的时候将会报错(https://github.com/langgenius/dify-official-plugins/issues/551):# 详细查看 https://docs.searxng.org/admin/settings/settings.html 文档
use_default_settings: true
general:
debug: false
instance_name: "我的专属搜索引擎"
server:
secret_key: "ultrasecretkey"
limiter: false # 关闭访问频率限制
image_proxy: true
search:
autocomplete: "baidu"
default_lang: "zh-CN"
formats:
- html
- json # 允许以 json 形式返回结果
ui:
static_use_hash: true
default_locale: "zh-Hans-CN"
theme_args:
simple_style: auto
engines:
- name: bing
engine: bing
shortcut: bi
timeout: 5.0
disabled: false
- name: bing images
engine: bing_images
shortcut: bii
- name: bing news
engine: bing_news
shortcut: bin
- name: bilibili
engine: bilibili
shortcut: bil
timeout: 5.0
disabled: false
# 360 搜索
- name: 360search
engine: 360search
shortcut: 360so
timeout: 5.0
disabled: false
# 百度
- name: baidu
engine: baidu
shortcut: baidu
timeout: 5.0
disabled: false
- name: baidu images
baidu_category: images
categories: [images]
engine: baidu
shortcut: bdi
disabled: false
- name: baidu kaifa
baidu_category: it
categories: [it]
engine: baidu
shortcut: bdk
disabled: false
# 搜狗
- name: sogou
engine: sogou
shortcut: sogou
timeout: 5.0 # 搜狗有点慢,需要额外加点超时时长
# 爱奇艺
- name: iqiyi
engine: iqiyi
shortcut: iq
# 搜狗视频
- name: sogou_video
engine: sogou_video
shortcut: sogouv
# 搜狗|微信
- name: sogou wechat
engine: sogou_wechat
short: sogouw
disabled: false
# 禁用默认启用的引擎
- name: arch linux wiki
engine: archlinux
disabled: true
- name: duckduckgo
engine: duckduckgo
distabled: true
- name: github
engine: github
shortcut: gh
disabled: true
- name: wikipedia
engine: wikipedia
disabled: true
- name: currency
engine: currency_convert
categories: general
shortcut: cc
disabled: true
- name: startpage
engine: startpage
shortcut: sp
disabled: true
- name: qwant
qwant_categ: web
engine: qwant
shortcut: qw
disabled: true
- name: dictzone
engine: dictzone
shortcut: dc
disabled: true
- name: lingva
engine: lingva
shortcut: lv
disabled: true
- name: mymemory translated
engine: translated
shortcut: tl
timeout: 5.0
disabled: true
- name: brave
engine: brave
shortcut: br
disabled: true
- name: duckduckgo
engine: duckduckgo
shortcut: ddg
disabled: true
- name: wikidata
engine: wikidata
shortcut: wd
disabled: true
redis:
url: redis://redis:6379/0
categories_as_tabs:
general: #综合
images: #图片
videos: #视频
news: #新闻
#map: #地图
#music: #音乐
#it: #信息技术
#science: #科学
#files: #文件
#social media: #社会媒体将
searxng/settings.yml中的ultrasecretkey替换为新的秘钥,否则启动会失败sed -i "s|ultrasecretkey|$(openssl rand -hex 32)|g" searxng/settings.yml启动 searXNG 服务
docker compose up -d此时,访问http://192.168.0.104:28080即可使用 searXNG。(注意替换为你配置的 ip 和端口)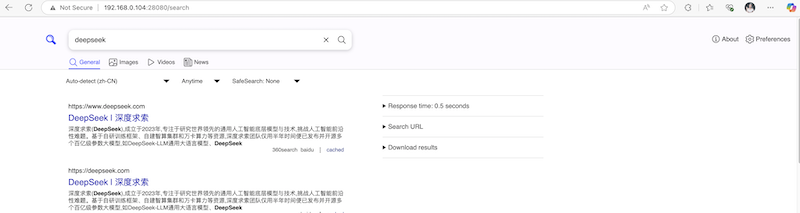
在 Dify 中使用 searXNG
右上角
插件–安装插件–Marketplace搜索SearXNG,点击安装即可。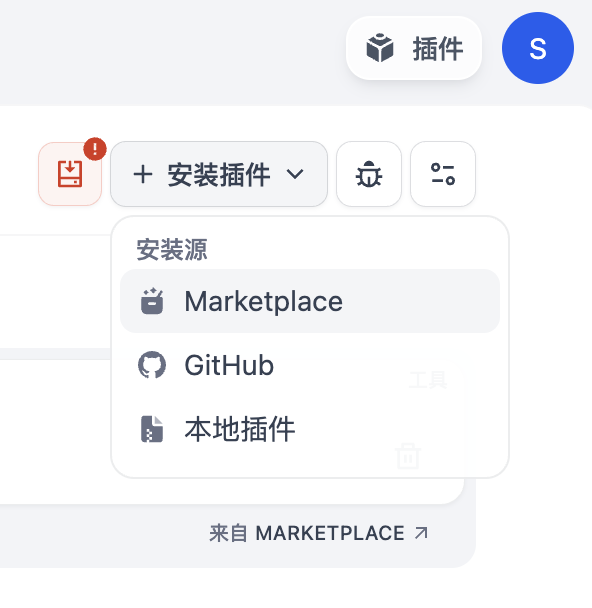
安装完成后,在
工具中可以看到SearXNG,点击授权,输入SearXNG的地址。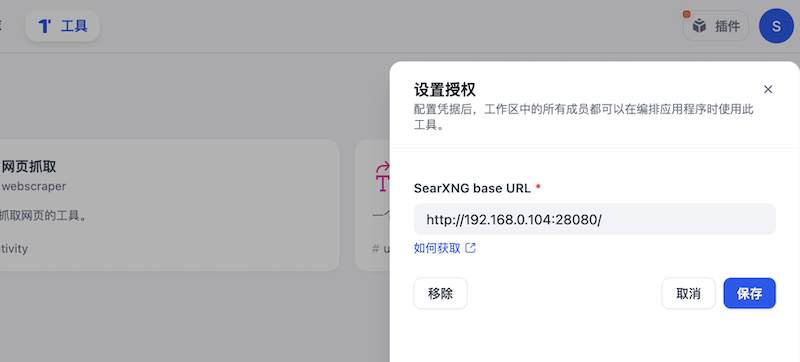
在
工作室–Agent中创建空白应用,此时在工具中可以开启searxng。开启后即可搜索一些具有时效性的数据啦。
在 LangChain 中使用 searXNG
我以 ollama 为例,演示在 LangChain 中使用 searXNG。
请先安装依赖:
pip install langchain_community langchain_ollama简单跑通,测试下 searXNG 能力
from langchain_community.utilities import SearxSearchWrapper
search_tool = SearxSearchWrapper(searx_host="http://192.168.0.104:28080")
result = search_tool.run("请告诉我2025年4月份中国cpi指数")
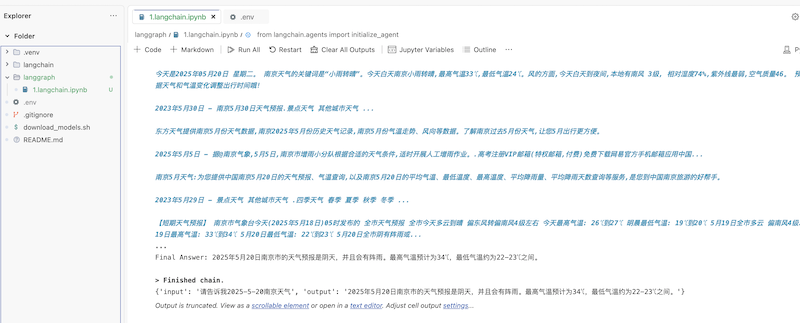
print(result)加入 Agent 调用
结果如下图所示:
from langchain_ollama import ChatOllama

llm = ChatOllama(model="qwen2.5:latest", base_url="http://192.168.0.99:11434")

from langchain.agents import load_tools

tools = load_tools(
    ["searx-search"],
    searx_host="http://192.168.0.104:28080"
)

# 示例:在 Agent 中使用
from langchain.agents import initialize_agent

agent = initialize_agent(
    tools=tools,
    llm=llm,
    agent="zero-shot-react-description",
    verbose=True
)

result = agent.invoke("请告诉我2025-5-20南京天气")
print(result)