Tavily is down again, even with a VPN. There’s an urgent need for an open-source search engine replacement, and searXNG is a good choice.
Both searXNG and Dify are still relatively young, with some issues in project design and usability—you’ll experience these firsthand.
If you install it following the official website or some video tutorials, you’ll likely encounter an error when Dify calls searXNG:
Input should be a valid dictionaryPlease follow the installation and configuration steps in this article strictly.
Using searXNG in Dify
Installation of Dify is omitted.
1. Install searXNG
git clone git@github.com:searxng/searxng-docker.git
cd searxng-docker
2. Modify searXNG Configuration
Modify the hidden file
.envin the current directory, changingSEARXNG_HOSTNAMEto the address you want to listen on (if you want to access it within the local network, not just localhost).SEARXNG_HOSTNAME=192.168.0.104:28080 # This port must match the port in the docker-compose.yaml belowModify the
docker-compose.yamlfile in the current directory, removing Caddy-related content (Caddy is similar to Nginx but requires certificate configuration, which we don’t need here). You can directly copy the following content to overwrite the original file.services:
redis:
container_name: redis
image: docker.io/valkey/valkey:8-alpine
command: valkey-server --save 30 1 --loglevel warning
restart: unless-stopped
networks:
- searxng
volumes:
- valkey-data2:/data
cap_drop:
- ALL
cap_add:
- SETGID
- SETUID
- DAC_OVERRIDE
logging:
driver: "json-file"
options:
max-size: "1m"
max-file: "1"
searxng:
container_name: searxng
image: docker.io/searxng/searxng:latest
restart: unless-stopped
user: "1000:1000"
networks:
- searxng
ports:
- "28080:8080" # This port on the left must match the port configured in SEARXNG_HOSTNAME
volumes:
- ./searxng:/etc/searxng:rw
environment:
- SEARXNG_BASE_URL=http://${SEARXNG_HOSTNAME:-localhost}/
- UWSGI_WORKERS=${SEARXNG_UWSGI_WORKERS:-4}
- UWSGI_THREADS=${SEARXNG_UWSGI_THREADS:-4}
cap_drop:
- ALL
cap_add:
- CHOWN
- SETGID
- SETUID
logging:
driver: "json-file"
options:
max-size: "1m"
max-file: "1"
networks:
searxng:
volumes:
valkey-data2:The most crucial step is to modify the
./searxng/settings.ymlfile. Delete all its contents and paste the following content. Otherwise, Dify will report an error when called(https://github.com/langgenius/dify-official-plugins/issues/551):# 详细查看 https://docs.searxng.org/admin/settings/settings.html 文档
use_default_settings: true
general:
debug: false
instance_name: "我的专属搜索引擎"
server:
secret_key: "ultrasecretkey"
limiter: false # 关闭访问频率限制
image_proxy: true
search:
autocomplete: "baidu"
default_lang: "zh-CN"
formats:
- html
- json # 允许以 json 形式返回结果
ui:
static_use_hash: true
default_locale: "zh-Hans-CN"
theme_args:
simple_style: auto
engines:
- name: bing
engine: bing
shortcut: bi
timeout: 5.0
disabled: false
- name: bing images
engine: bing_images
shortcut: bii
- name: bing news
engine: bing_news
shortcut: bin
- name: bilibili
engine: bilibili
shortcut: bil
timeout: 5.0
disabled: false
# 360 搜索
- name: 360search
engine: 360search
shortcut: 360so
timeout: 5.0
disabled: false
# 百度
- name: baidu
engine: baidu
shortcut: baidu
timeout: 5.0
disabled: false
- name: baidu images
baidu_category: images
categories: [images]
engine: baidu
shortcut: bdi
disabled: false
- name: baidu kaifa
baidu_category: it
categories: [it]
engine: baidu
shortcut: bdk
disabled: false
# 搜狗
- name: sogou
engine: sogou
shortcut: sogou
timeout: 5.0 # 搜狗有点慢,需要额外加点超时时长
# 爱奇艺
- name: iqiyi
engine: iqiyi
shortcut: iq
# 搜狗视频
- name: sogou_video
engine: sogou_video
shortcut: sogouv
# 搜狗|微信
- name: sogou wechat
engine: sogou_wechat
short: sogouw
disabled: false
# 禁用默认启用的引擎
- name: arch linux wiki
engine: archlinux
disabled: true
- name: duckduckgo
engine: duckduckgo
distabled: true
- name: github
engine: github
shortcut: gh
disabled: true
- name: wikipedia
engine: wikipedia
disabled: true
- name: currency
engine: currency_convert
categories: general
shortcut: cc
disabled: true
- name: startpage
engine: startpage
shortcut: sp
disabled: true
- name: qwant
qwant_categ: web
engine: qwant
shortcut: qw
disabled: true
- name: dictzone
engine: dictzone
shortcut: dc
disabled: true
- name: lingva
engine: lingva
shortcut: lv
disabled: true
- name: mymemory translated
engine: translated
shortcut: tl
timeout: 5.0
disabled: true
- name: brave
engine: brave
shortcut: br
disabled: true
- name: duckduckgo
engine: duckduckgo
shortcut: ddg
disabled: true
- name: wikidata
engine: wikidata
shortcut: wd
disabled: true
redis:
url: redis://redis:6379/0
categories_as_tabs:
general: #综合
images: #图片
videos: #视频
news: #新闻
#map: #地图
#music: #音乐
#it: #信息技术
#science: #科学
#files: #文件
#social media: #社会媒体Replace
ultrasecretkeyinsearxng/settings.ymlwith a new secret key; otherwise, the startup will fail.sed -i "s|ultrasecretkey|$(openssl rand -hex 32)|g" searxng/settings.ymlStart the searXNG service.
docker compose up -dAt this point, you can use searXNG by accessinghttp://192.168.0.104:28080. (Remember to replace it with the IP and port you configured.)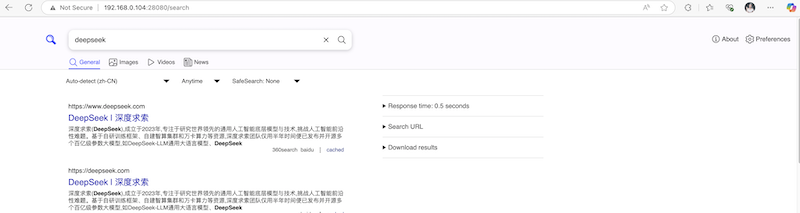
Using searXNG in Dify
Click
Pluginsin the top-right corner, thenInstall Plugin, search forSearXNGin theMarketplace, and clickInstall.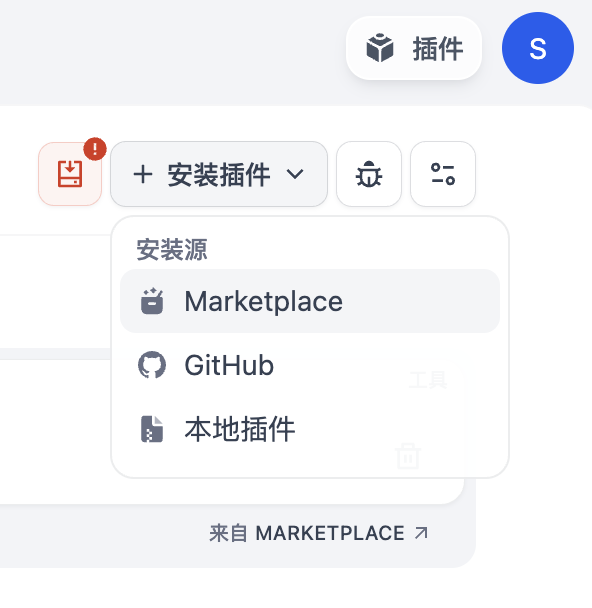
After installation, you can see
SearXNGin theToolssection. ClickAuthorizeand enter the address ofSearXNG.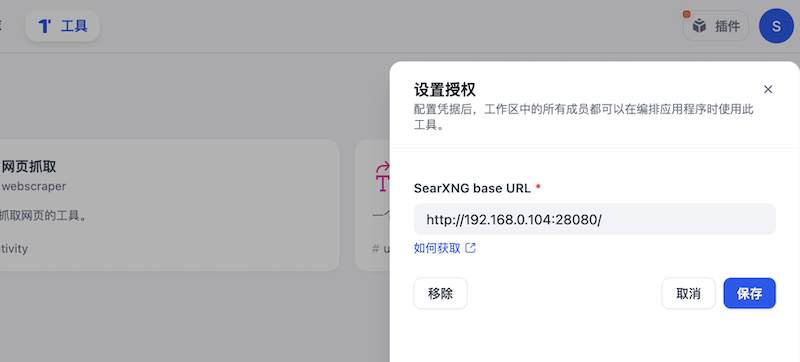
Create a blank application in
Studio–Agent. At this point, you can enablesearxngin the tools. Once enabled, you can search for some time-sensitive data.
Using searXNG in LangChain
I’ll use Ollama as an example to demonstrate using searXNG in LangChain.
Please install the dependencies first:
pip install langchain_community langchain_ollamaSimple Test to Verify searXNG Capabilities
from langchain_community.utilities import SearxSearchWrapper

search_tool = SearxSearchWrapper(searx_host="http://192.168.0.104:28080")
result = search_tool.run("Please tell me the CPI index of China in April 2025.")
print(result)
Integration into an Agent
from langchain_ollama import ChatOllama
llm = ChatOllama(model="qwen2.5:latest", base_url="http://192.168.0.99:11434")
from langchain.agents import load_tools
tools = load_tools(
["searx-search"],
searx_host="http://192.168.0.104:28080"
)
# 示例:在 Agent 中使用
from langchain.agents import initialize_agent
agent = initialize_agent(
tools=tools,
llm=llm,
agent="zero-shot-react-description",
verbose=True
)
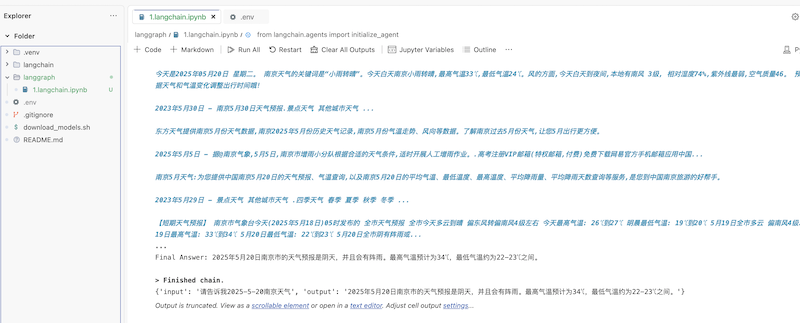
result = agent.invoke("请告诉我2025-5-20南京天气")
print(result)The result is shown in the following image:
Simply want to say your article is as astonishing.
The clearness for your put up is just spectacular and
that i can suppose you’re a professional in this subject.
Well along with your permission let me to clutch your RSS feed to stay updated with
imminent post. Thank you one million and please continue the rewarding work.